top of page
Discussion on tilecoach.com

General Tile Discussion

Public·156 members

Custom gasket for frameless shower door hinges that penetrate the waterproofing layer...

here's the hinges installed... flat surface needed for these custom gaskets
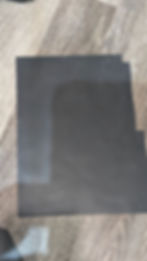
1/32" gasket material from amazon
heres the material i bought. it comes in white, black, clear and other colors. (i also used this material as a gasket between the vanity top and the faucet because the manufacturer's gasket was lacking)

place the hinge on the material and trace a border roughly 1/2" wider on all sides, then cut it out


trace the exact hinge perimeter and holes with a mechanical pencil
cut off the corners so you'll be able to line the hinge up perfectly with your marks on the mounting surface. its ok to SLIGHTLY cut off the corners of the marked hinge perimeter.
punch out the holes with a hole punch (although you could skip this step for an additional level of waterproofing and just screw right thru this gasket. if you do skip this step just ensure that your drilled holes are aligned perfectly with the hinge before placing the gasket as you will not be able to see the holes once the gasket is in place.)

mark your hinge location and extend the lines with light pencil. mark and drill the holes.
drill the holes
drill the holes
use a good silicone caulk for the holes (if you put too much you'll have a lot of squeeze out, if you put too little it wont help at all. what i did was put excess, then pushed a screw in before placing the gasket to get the squeeze out cleaned up before installing the hinge.)
here's my prepped gasket before install
prepped gasket with overlayed hinge
place the gasket on your install spot. a LITTLE silicone keeps it in place
screw in your hinge while aligning the visible corners. as you screw it in, the gasket will squeeze out a little and you'll know there is a good seal.
i used light pressure with an exacto knife to trim the gasket. you could use a utility knife as well, i just felt the smaller knife was a little more precise. be careful to not use heavy pressure and to start and end the cuts right at the corners of the hinge to not damage the underlying material.
if you angle the knife so the blade goes under the hinge as you cut it, you'll have a clean cut and you won't damage the finish on your hinges.
i used some alcohol and a toothbrush to clean off the pencil marks and the squeeze out before the silicone dried (i trimmed the top a little better after this pic)
finished install that is now more waterproof with the gasket. i used black gasket for the matte black hinges, you should try to color match the gasket material to your hinges or the underlying material. if you cant color match, use the clear one

finished door install (still have to finish up the matching base trim, caulk, and i'm going to make a custom 3d printed fan grate that matches the wall color because the old one is too big with the new shower trim)

Any thoughts? let me know.


49 Views

Members

bottom of page